|
| |
|
|
|
|
|
|
|
|
|
| Photo5 Page |
|
|
My IH Cub Cadet 104
|
Love at first sight?
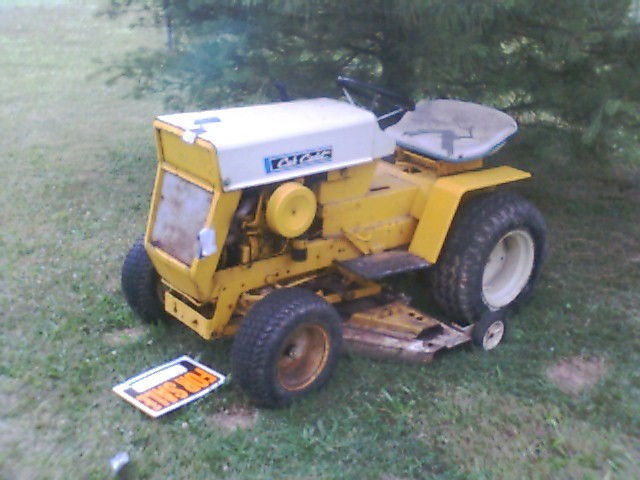
I have owned a couple newer Cub Cadets in the past, and they have been good to me. I have been kicking the idea around awhile about getting an old tractor to fix up a bit and have some fun with. I was driving down the road one day and happened upon this old 104. I stopped to look at it, and noticed it was in pretty good shape. The deck looked kind of bad and the front wheels were pretty rusty looking. The seat upholstry is beyond repair, but these are all normal things for a 1968 (I think) tractor. It has a 10HP Kohler K-241 which started and ran fine, and the deck worked. I made a phone call, and about 4 days later, the guy who owned it had it on a trailer on its way to it's new home.
|
|
Before I knew it...
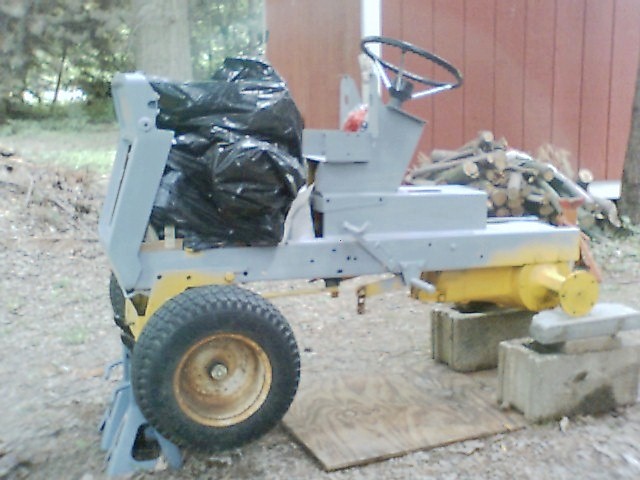
What originally was to be a clean-up job and maybe some paint on the deck and hood; which was freshly painted, but they painted over the old original decals? I took the deck completely apart, primered and painted it, painted the hardware, greased the spindles and sharpened the blades. The hood was the next thing to come off, then the fenders, seat, instrument panel, etc. followed closely behind. I was painting too many parts at different times to use a spray gun. I was sanding on one thing while the paint was drying on another part, so I opted for the spray cans. It's not going to be a show tractor, and will still see use mowing or pulling a dump cart, so I thought the spray cans would be adequate. I masked off the engine as good as I could, sanded and wire brushed the entire frame, pushed it out behind the barn and started primering it. |
|
A little progress
After several coats of primer, it was all sanded down once again and cleaned to ready for paint. Since it was not totally disassembled prior to painting, I had to paint it in different sections pretty much. I first painted the gear shifter, transmission, and rear end, then started painting the frame. As I painted things, the other things that did not look too bad before started sticking out more. At this point here, I was basically ready to start primering and painting the fenders, instrument panel, hood, air breather, etc..
|
|
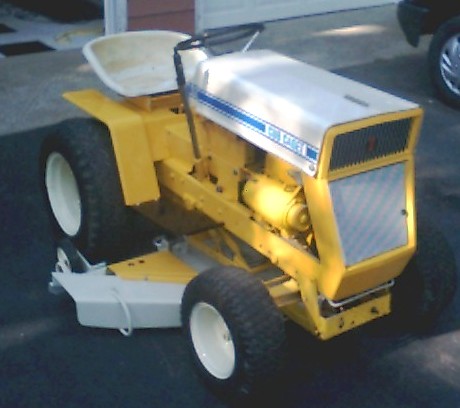
Lookin' a little better!
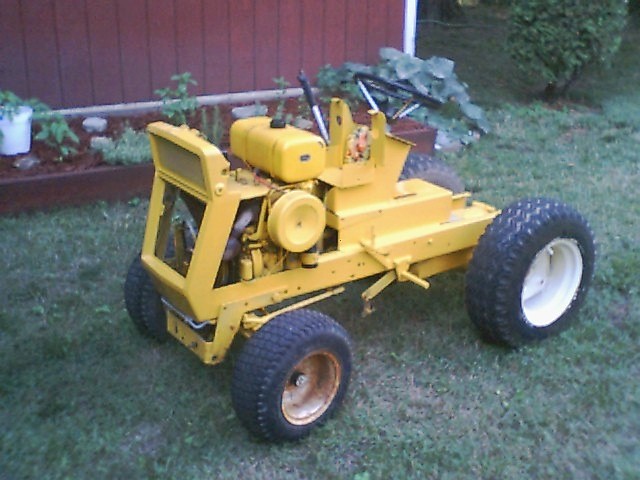
Well, here is basically the finished product. I have yet to add up the reciepts, but at last count I was at I think 18 cans of primer and paint. By this time, the decal set was delivered. Here it is after applying the new decals. I decided to hold off a bit on reupholstering the seat, and just cleaned off the old foam that was glued to the fiberglass seat. Not the most comfortable thing, but it cant be as bad as an old cast irion seat found on older tractors. Also, notice the front wheels. They were took down to bare metal, primered and painted also. They came out surprisingly well, and in fact, the left front wheel was the worst.
|
|
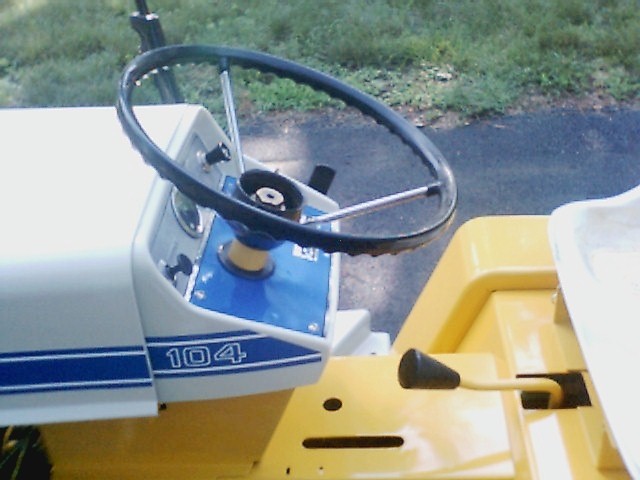
Getting it back together
Here you can see a little more detail such as the painted steering column, new grommet on the instrument panel that the steering column passes through that was all dried out and brittle. The aluminum piece on the instrument panel was painted then clearcoated. There was also a place for a cigarette lighter that I thought was pretty cool. Even though its not original equipment, it is now equipped with a lighter, only because smokers these days seem to have no rights...even the "ashytrays" of new cars have a "NO SMOKING" symbol in them. You can also see there is still no center cap for the steering wheel, but I plan to get one. Also visible is the handle that engages the mowing deck; It was painted yellow with that black rubber type stuff like on the handles of pliers. I painted the handle then dipped it in the rubber stuff three times over three days. The shifter handle was dull looking, so I opted to dip it as well. Cheaper than anew $15 replacement, and will work just as good. Granted, it does not have the "R-1-2-3" in an "H" pattern on the shifter, but if you have to have that, chances are you shouldnt be on the tractor. LOL
|
|
Going too smooth...
I should have known that I would run into problems somewhere along the line. Waiting longer than expected on a decal set and a couple other things was not so big a deal but after getting everything put back together, I opened the garage door to start the tractor and let it run for awhile, as it had been almost a month since it was started. I hit the key, it turns over, but no spark to the plug. What seemed simple at first turned into a full scale fiasco. I replaced the wire going from the negative side of the coil to the points, checked and cleaned the points, regapped the spark plug, replaced the positive battery cable that was about wore in half, and it finally started. Looking at the finished tractor for three days before finally getting to ride it around was hard to tolerate. I only had it two days before starting to take it apart, so I was really wanting to enjoy some seat time.
|
|
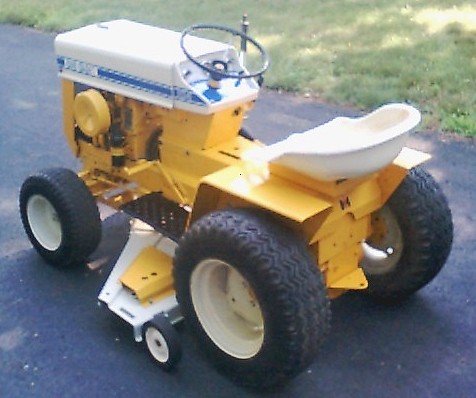
One last pic
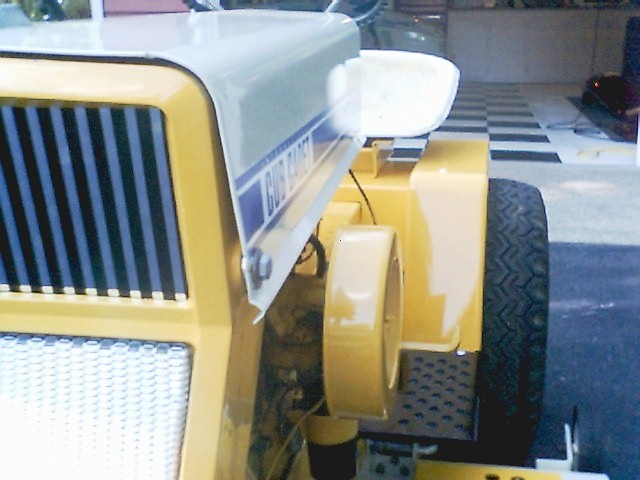
The bozos at TSC was out of International Harvester white for over a week and a half so I opted to spray the hood with a spray gun, as all they had was paint in quart cans. Ironically, the hood turned out so-so, but everything that was painted with a spray can looked twice as good. You can kind of see a little reflection of the seat in the side of the hood. But even with my POS digital camera, you can see a little reflection from my black truck in the side of the grille, just under the hood bolt. You can also see the reflection of a pine tree in my front yard in the air breather. I plan to rebuild the engine which will get fresh paint then, when everything is disassembled. Near future plans also include changing the gear lube and oil, then I am basically done. Right now, I just want to drive it. LOL
|
|
|